Honeycomb balls are very easy to make and you can probably make it by using the stuffs or supplies from your house. It can be used as decoration for parties or events. You can DIY without having to purchase it from the store.
Paper (any paper will do but thin paper works best)
Scissors
Glue stick
Cardboard
Pencil
Ruler
Compass or any round object
Needle and thread
Step 1
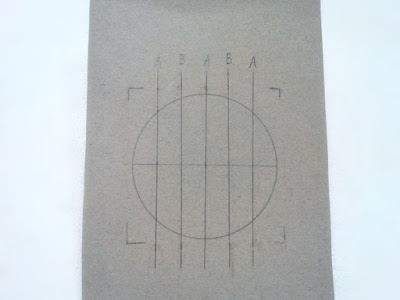
Draw a circle on a cardboard by using a compass or a round object. In this tutorial I will draw a circle of diameter 9 cm. You don't need to follow exactly the size of the honeycomb ball in this tutorial. You can decide how large you want your honeycomb ball be.
Step 2
Draw a horizontal line at the centre of the circle. On the horizontal line, measure and mark 1.5 cm for every section. Then draw vertical line at the mark. If you use circle of different size, you can divide the diameter of the circle into few equal section to get the length of the spacing between the lines. It doesn't matter if you use how many lines as long as they alternate like A-B-A-B-A. It's not necessary to get a very accurate measurement. Just make sure that the spacing between the lines is quite even.
Step 3
The line will be marked as line A and B alternatively. (A-B-A-B-A)
Step 4
You need to cut out the papers which is larger than the circle. I use paper with length of 9.5 cm. For a complete honeycomb balls we will need 20 sheets of paper. You can use 20-25 pieces of paper for one honeycomb ball.
Step 5
Place the paper on the cardboard with the drawn circle. Make sure that the paper covers the circle. Then take the sticky glue to stick along all the line A.
Step 6
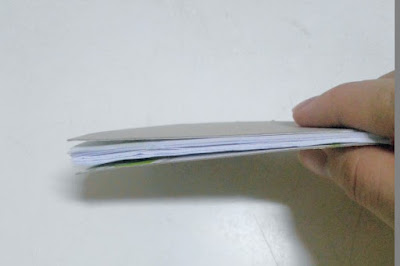
The place another piece of paper. Glue all the line B. Repeat the process by alternating your glue lines until you finish sticking 20 pieces of paper.
Step 7
Cut out a circle with diameter of 9 cm from cardboard.
Step 8
Trace the circle on the honeycomb papers. then cut it out. After tracing the circle on the paper, you can cut the cardboard slightly smaller than the honeycomb ball papers so that when you open up the ball, the cardboard hides well between the papers so it is less visible.
Step 9
Cut the papers and cardboard into halves and make sure that the cutting on the papers is perpendicular to the glue line.
Step 10
Now we have 2 semicircles. Glue the 2 semicircles together at the glue line, Make sure that the glue line where you glue is alternative to the glue line on the previous sheet.
Step 11
Glue the cardboard to both ends of semicircle.
Step 12
Poke a hole and insert the thread and needle at the corner of the semicircles. Tie a knot at the thread and make sure that the thread loop is loose so that the papers have enough space to open around. Repeat this process at the other end. One end of the string can be left longer so that you can hang it up.
Step 13
Open the ball now. You can see the balls started to take its shape.
Step 14
Finally, you can glue the cardboard. You can choose to use masking tape or paper clips so that you can store them flat after that and you can use it in the next time.
You can choose to use tissue paper instead of using thin paper which gives a better result. You can use any measurement for the circle and the spacing between the lines. For the papers, you can use as many sheets as you like. The more you put, the smaller the spaces between the honeycombs. So it really depends on how you want to make it.
Although it takes some time to make these honeycomb balls, but it's so satisfying when you finally open up the balls and used that for decoration. So, enjoy making your own honeycomb balls!


No comments:
Post a Comment